Drawing a Christmas tree can feel hard at first, but with simple steps, anyone can achieve a beautiful result. A Christmas tree formed from its triangular-like shape and layered branches is an iconic image that symbolizes a holiday.
In this guide, we’ll walk through creating a detailed sketch of a Christmas tree that anyone can easily draw. We’ll start with the tree’s structure, focusing on its symmetrical shape, then add branches that give it a natural look. By the end, you’ll have a well-formed tree, ready for further decoration if you choose. Grab your pencil, and let’s begin with the outline of this nice freezing tree..
Let start
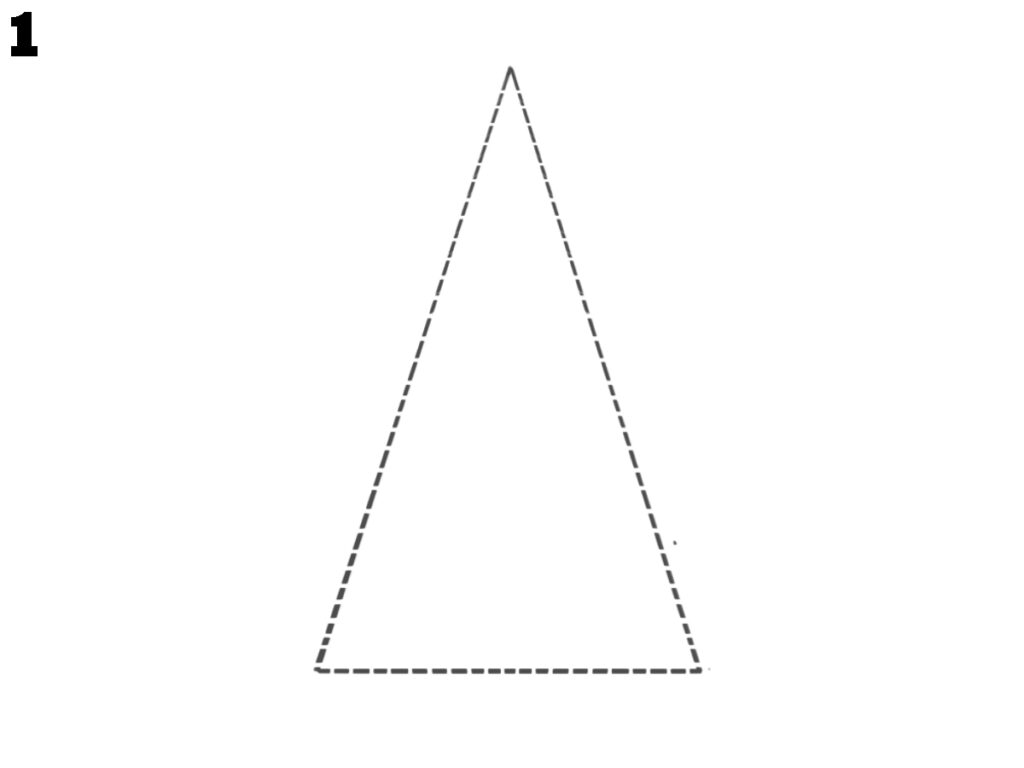
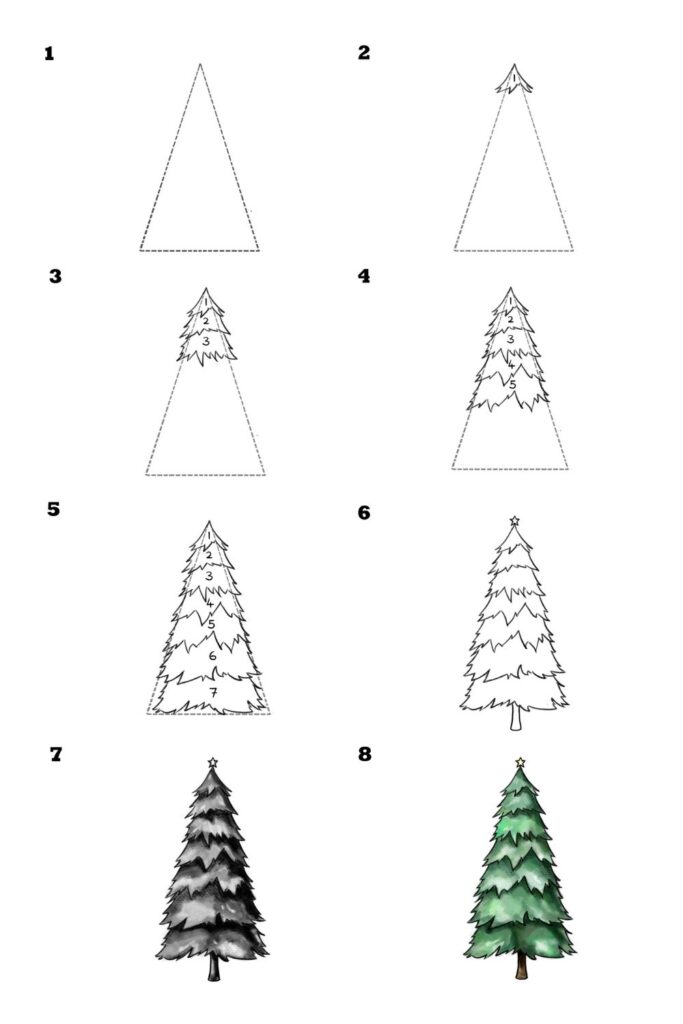
Step 1: To begin drawing your Christmas tree, create a simple triangle shape. Use dashed lines to mark the tree’s structure, ensuring it’s tall and pointed at the top, resembling the basic shape of a tree. This triangle will act as the guideline for the tree’s body, making it easier to add more details in the following steps. Perfect for beginners, this easy outline helps you create the perfect Christmas tree.
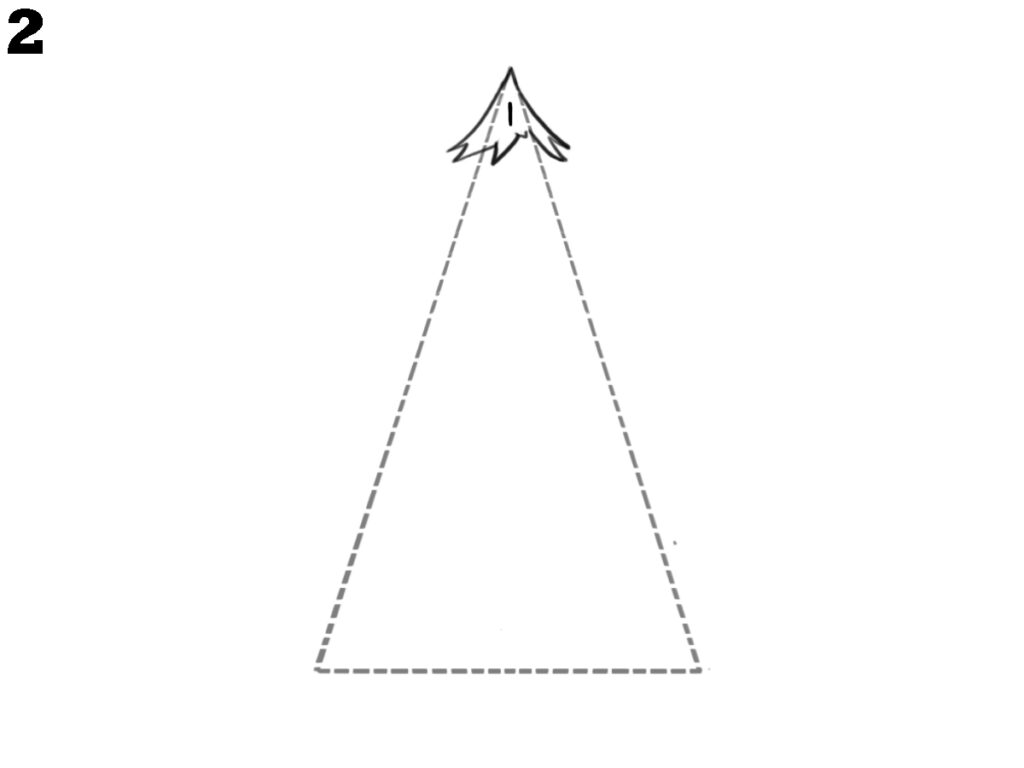
Step 2: Now, let’s add the first details to your Christmas tree. Start by drawing short, curved lines at the top of the triangle. These lines represent the tree’s top branches, creating a natural, layered effect. Notice how the branches fan outwards, giving the tree a realistic look. By adding these small branches, you’re beginning to shape your Christmas tree.
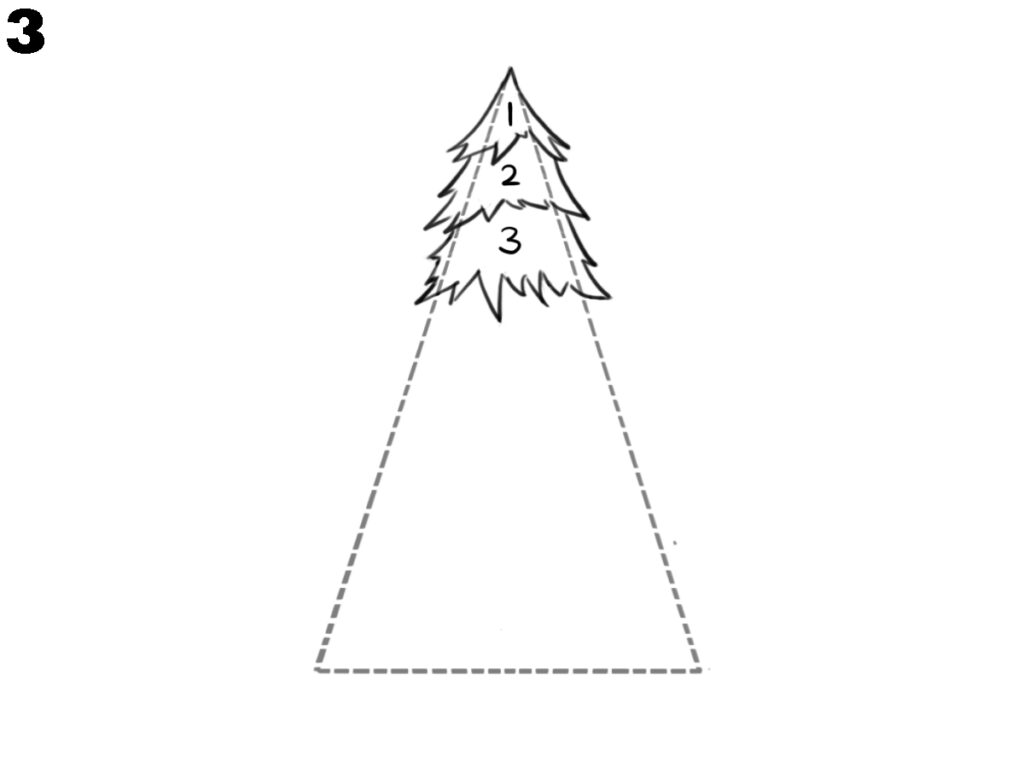
Step 3: Next, continue shaping the tree by drawing two more layers of branches below the top. Use jagged lines to give these branches a natural, fluffy look. Each layer should spread wider as you move down, following the triangle’s shape as a guide. This step gives your Christmas tree a fuller appearance, setting up the base for a perfect tree look.
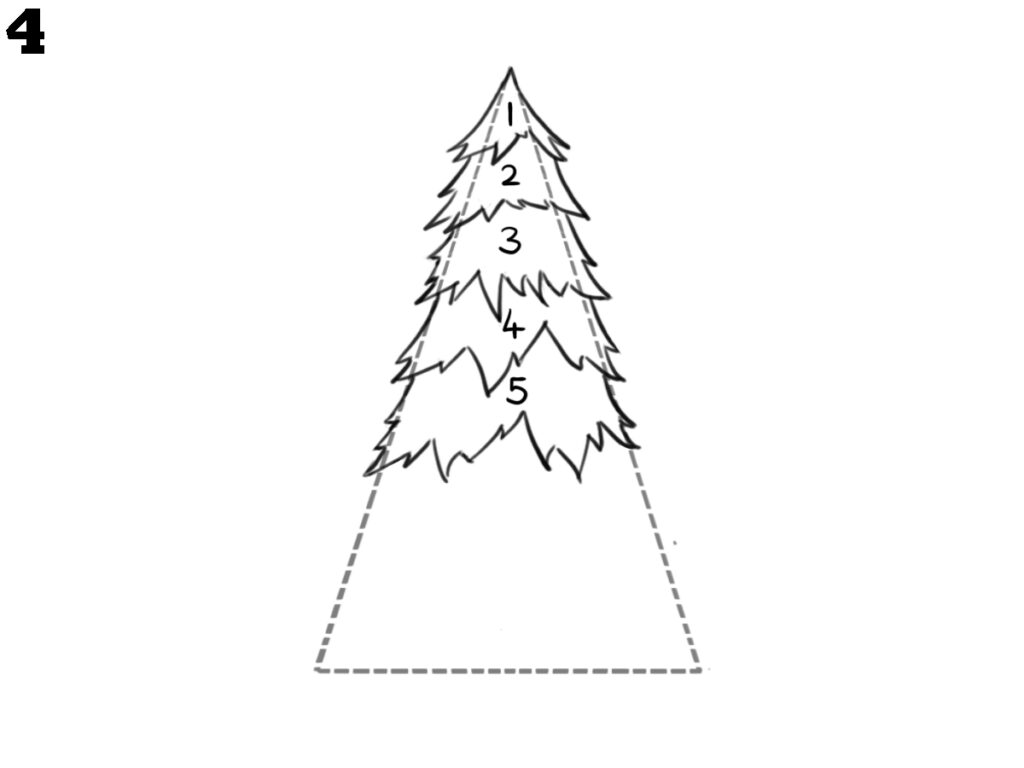
Step 4: In this step, refine the shape of your Christmas tree by adding two more branches, each slightly shorter than the previous layer. Start from the top and work your way down, drawing wavy lines that create a natural look for the branches. This layering effect builds depth and makes your tree look perfect.
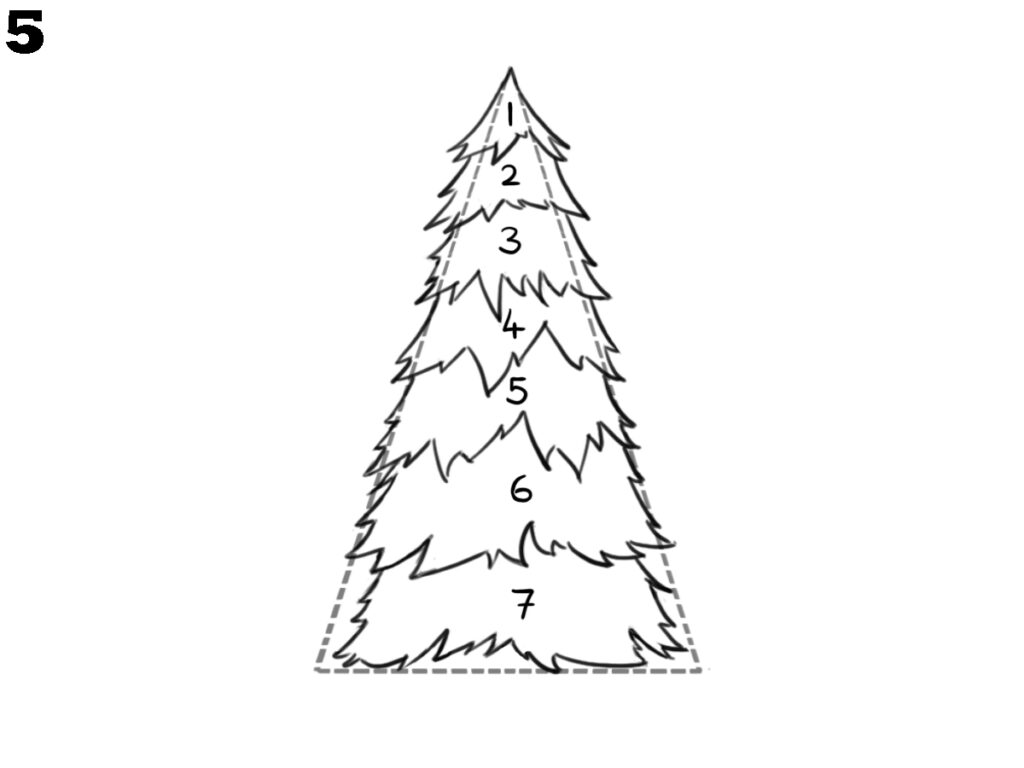
Step 5: Continue adding layers to your Christmas tree by drawing two more branches below layer 5, labelled 6 and 7. Make each layer slightly wider as you move down, using wavy lines to shape the branches naturally. These additional layers give your tree a fuller, more balanced look. Keep the dashed outline as a guide to maintain symmetry and ensure the tree tapers smoothly from top to bottom.
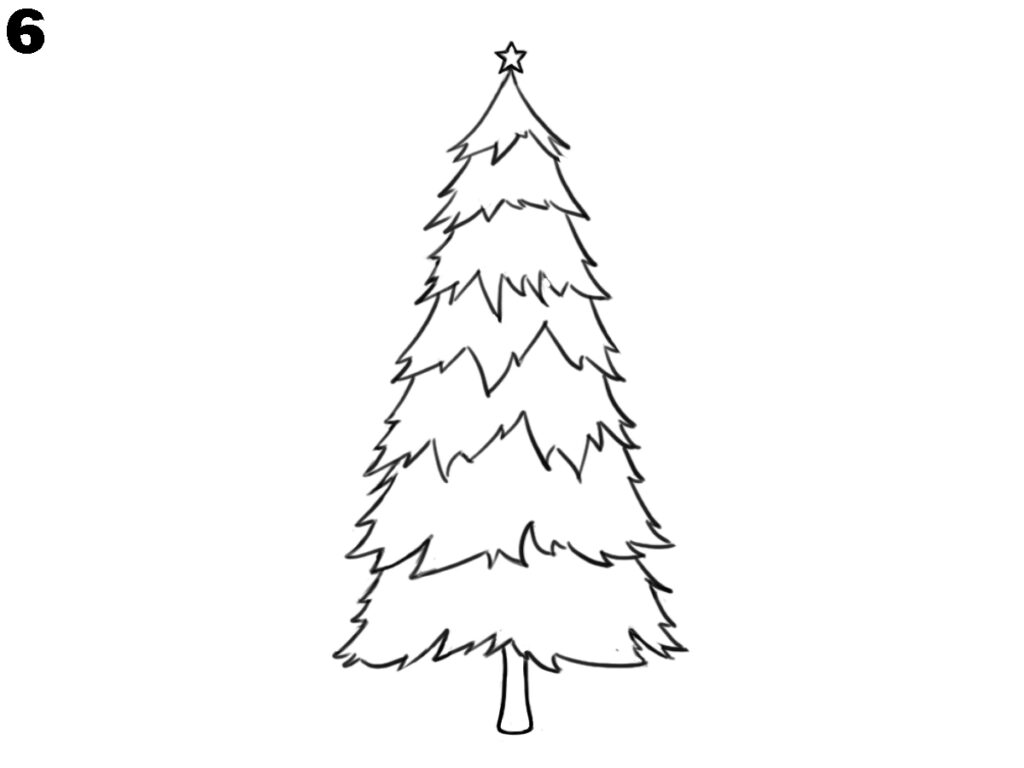
Step 6: Complete your Christmas tree by adding a small star on top and drawing a sturdy trunk at the bottom. The star should be simple, placed at the peak to highlight the tree’s height. For the trunk, draw a rectangular shape that aligns with the centre of the tree. This final touch brings balance and adds to the traditional look of a Christmas tree.
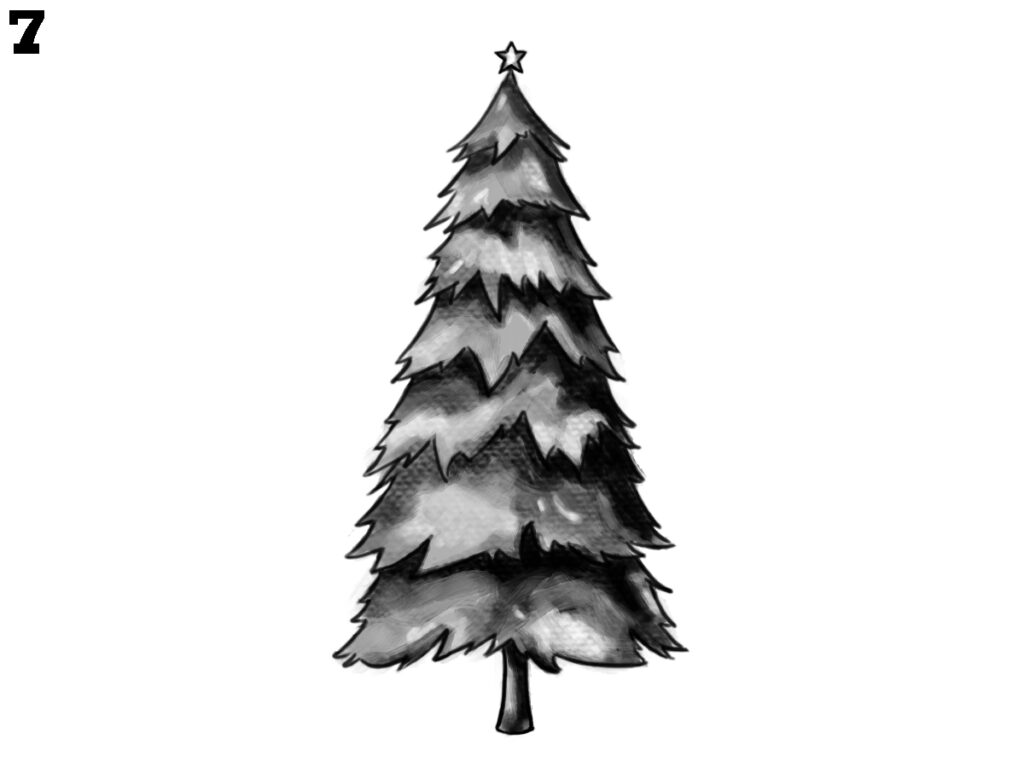
step 9: Now that your Christmas tree outline is ready, it’s time to add depth with shading. Focus on the tree’s branches by darkening areas between the layers of pine needles. Use short, gentle strokes to mimic the texture of real branches, shading the inner areas of the tree more heavily to create a shadow effect. Leave the outer edges lighter to give the impression of light hitting the tree. This technique will make your tree look more three-dimensional and realistic. Adjust the shading as needed to ensure a smooth perfect look.
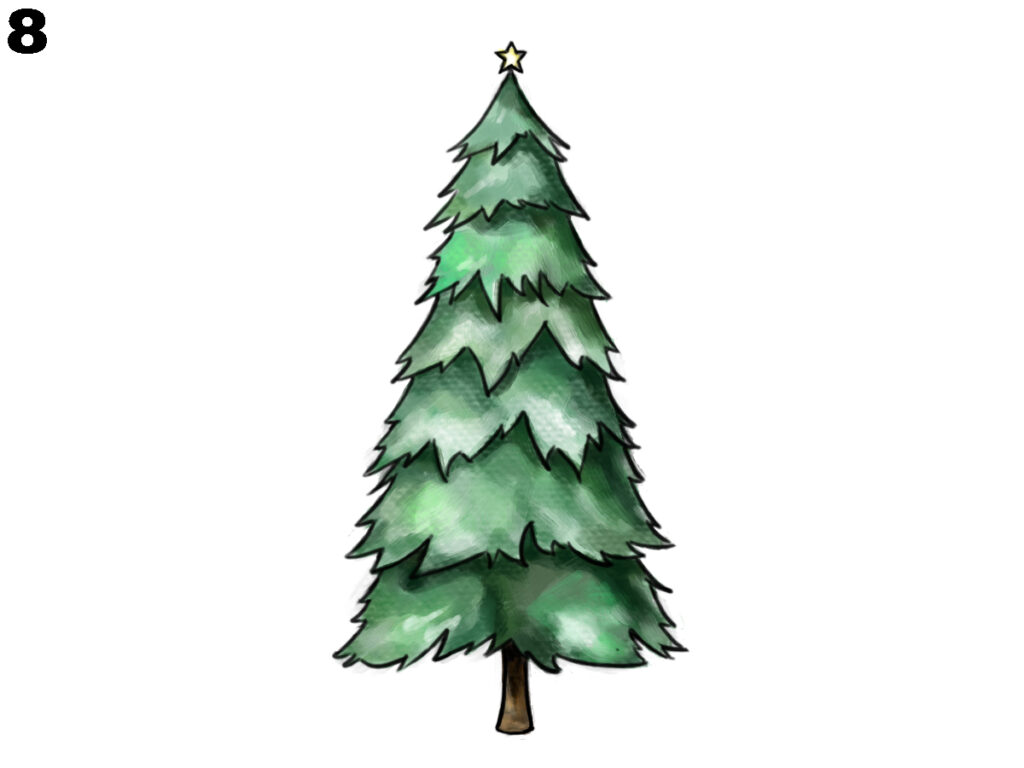
step 10: Now that your tree is shaded, it’s time to add colour! Begin by filling the tree with shades of green, using lighter tones on the outer branches and darker greens toward the centre. Make sure to blend the colours smoothly for a realistic appearance. You can add a touch of yellow for the star at the top and brown for the tree trunk. These colours will make your Christmas tree look vibrant and easy look.
Conclusion
Congratulations on completing your Christmas tree drawing! With each layer and branch, you’ve built a lovely, festive image that embodies the holiday of Christmas. From its pointed top crowned with a star to the structured branches, your tree now has a classic, evergreen shape. This drawing can be a base for adding personal touches, such as ornaments, lights, or even presents underneath. Whether you’re drawing for a holiday card or just to bring some festive feel to your art, this Christmas tree stands as a beautiful accomplishment. If you have any comments or suggestions regarding this post let me know through the contact me page.

