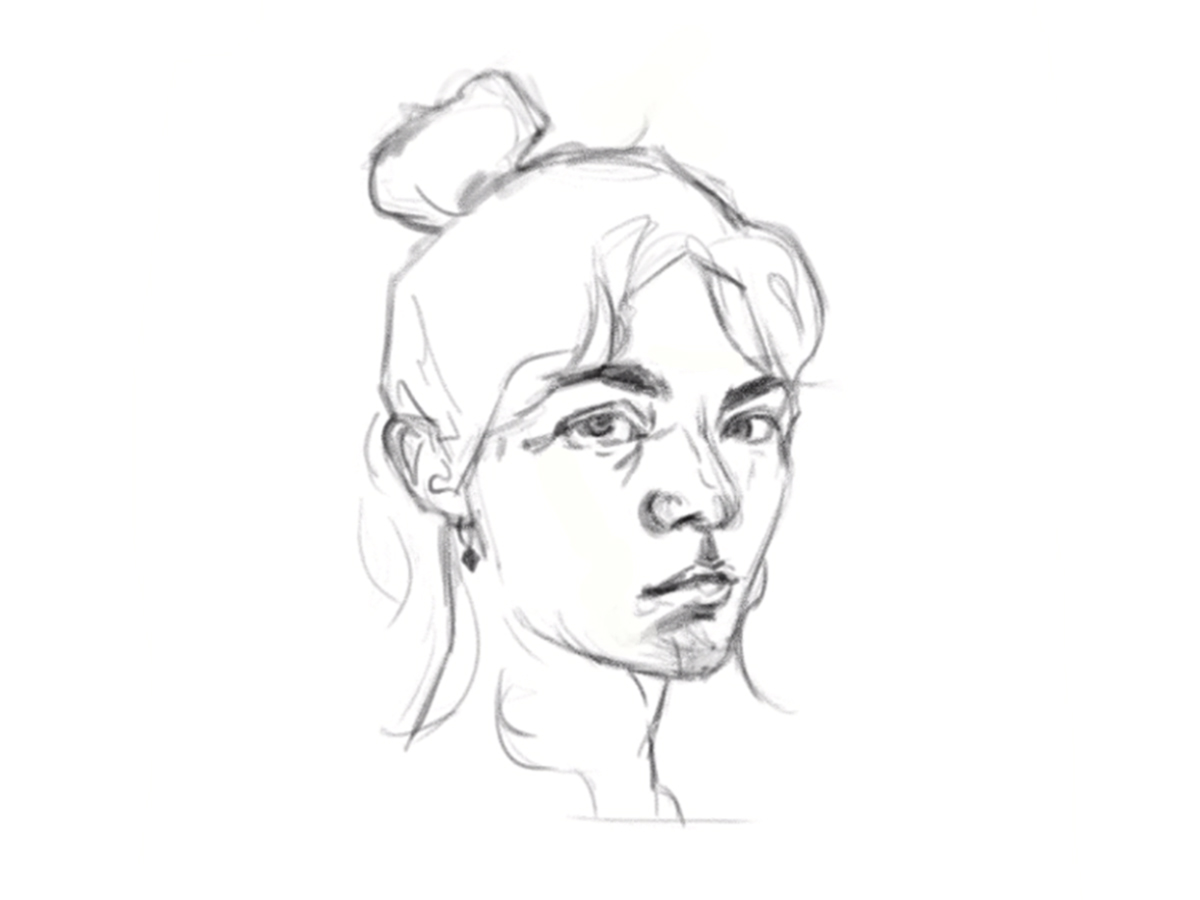
Welcome to my guide on “how to draw a face.” If you’ve ever felt unsure about where to start when sketching a face, this tutorial is here to help. This guide understandably offers easy instructions for anyone looking to sketch facial proportions and shapes. Whether you’re a beginner or someone seeking to refine your drawing skills, these guides will help to make it simple.
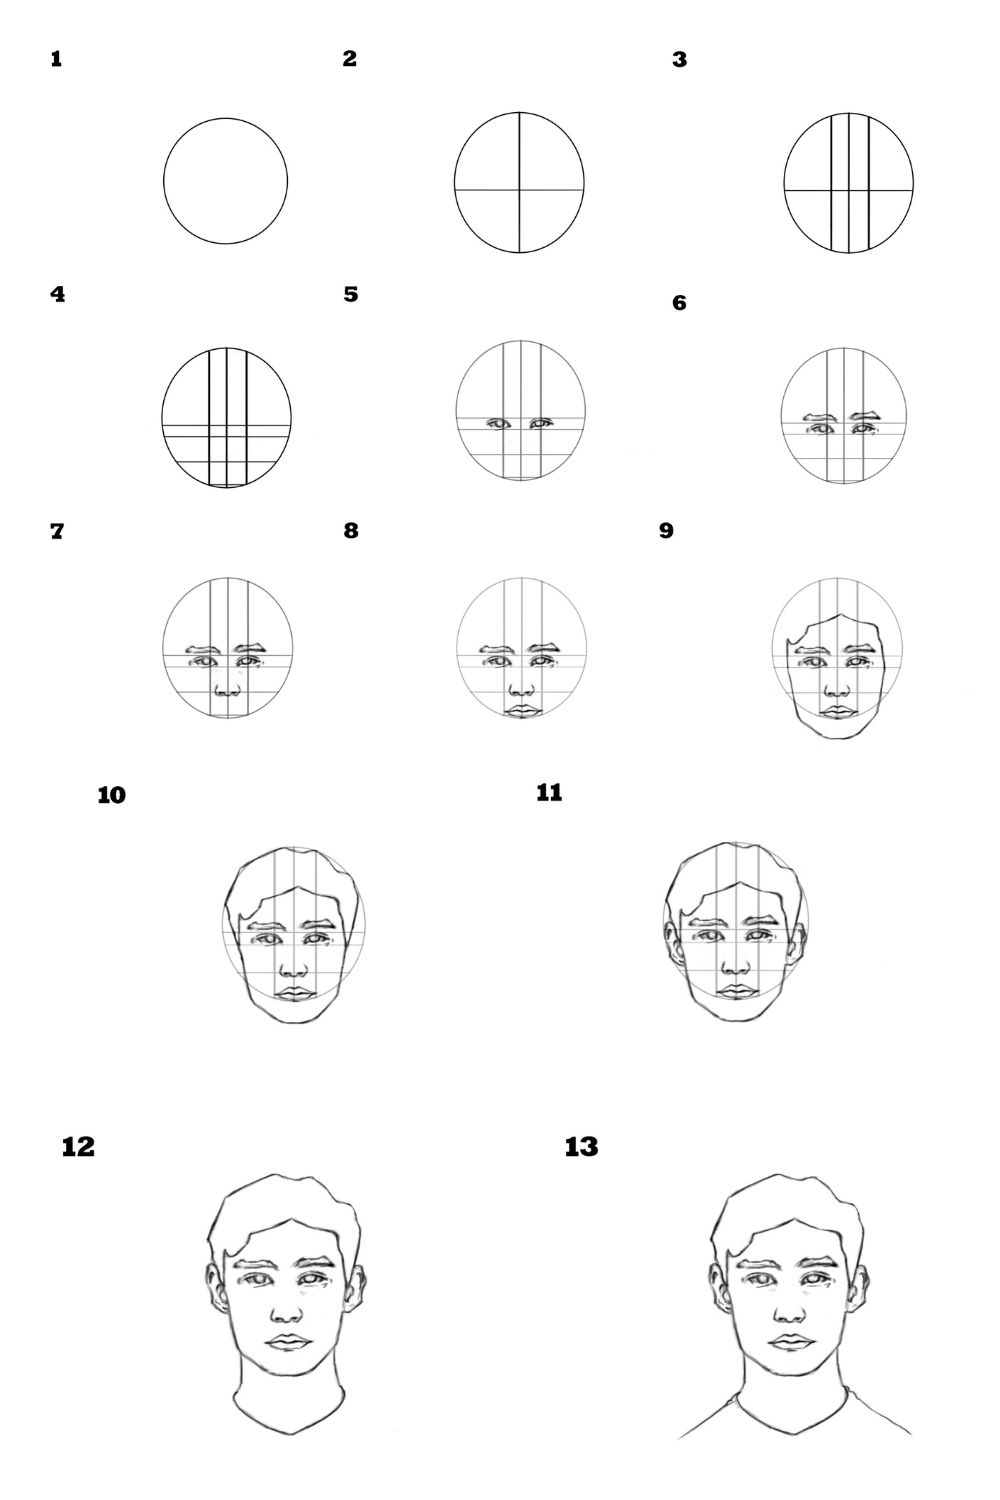
The key is to focus on identifying the features like eyes, nose, and mouth, and how they fit together. We start with the basic shape and add the line which helps to build the base. By understanding these basics, you’ll sketch start to progress. Let’s begin by exploring the essential aspects of drawing faces, making it clear and approachable for anyone willing to learn.
Let’s start
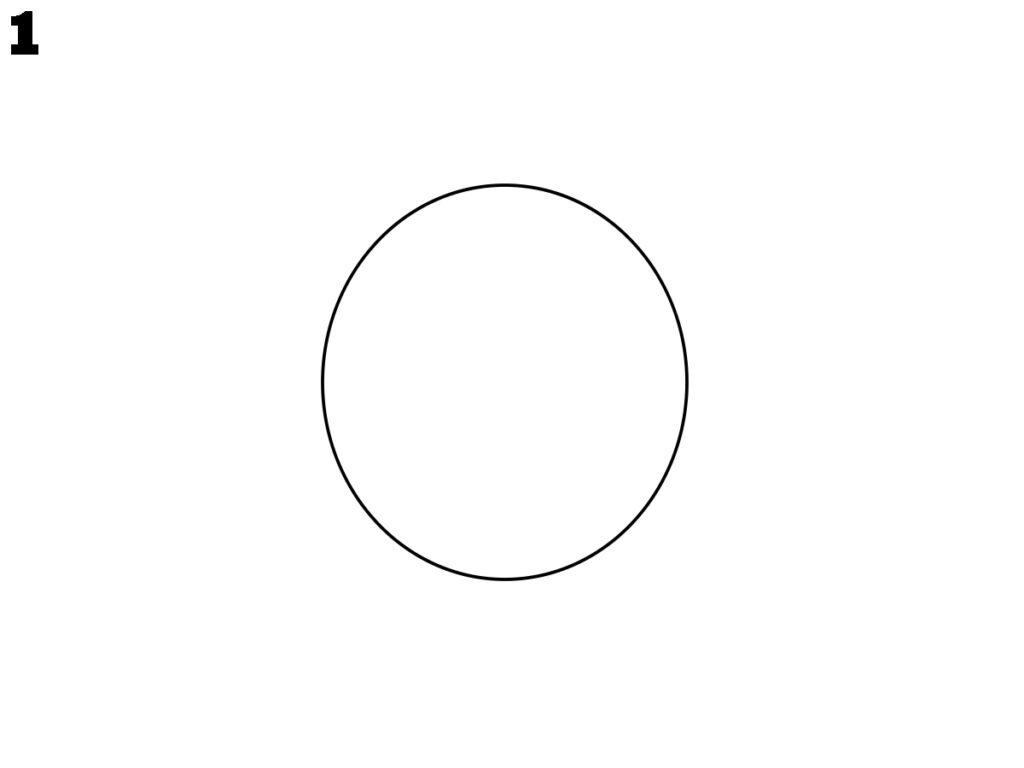
Step 1: Start with a simple circle as the foundation for your face drawing. This will serve as the head’s basic shape.
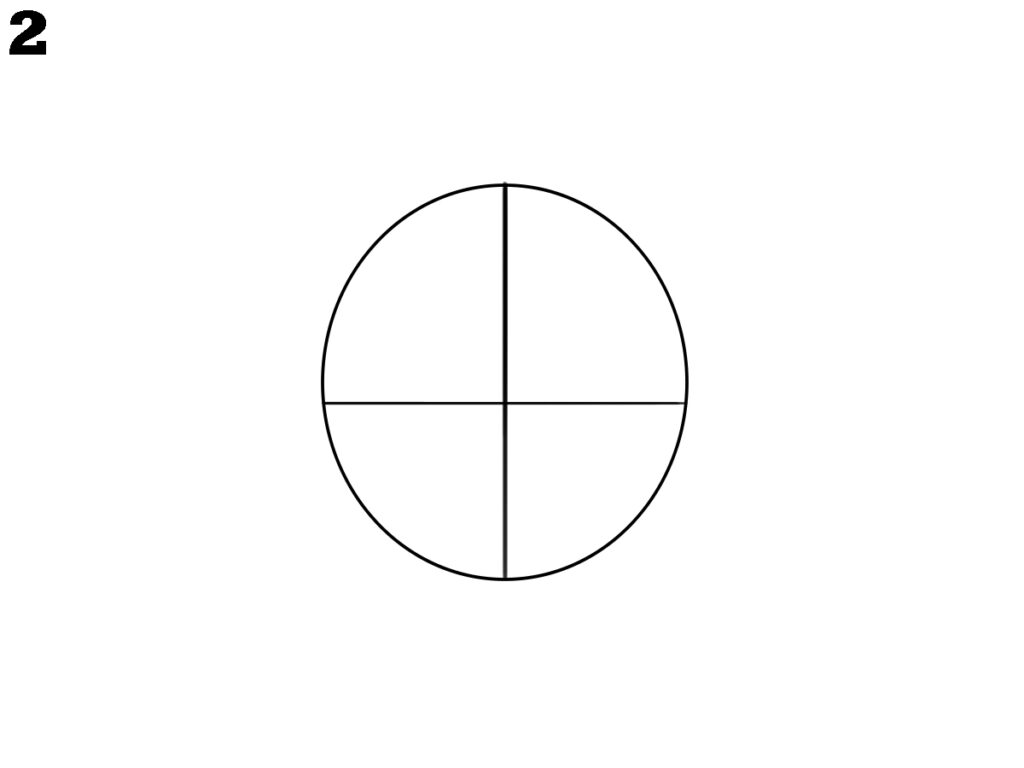
Step 2: Draw a vertical and horizontal line across the circle. These guidelines help you place facial features symmetrically when learning a face.
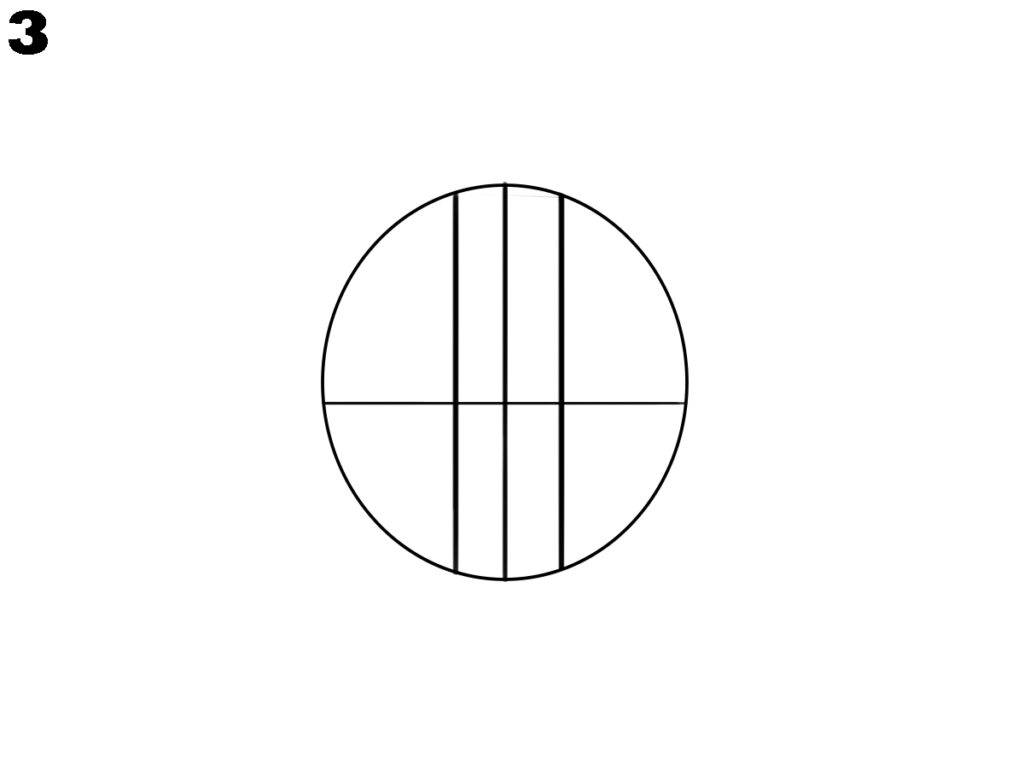
Step 3: Add two vertical lines inside the circle. These lines mark the width of the eyes and help with proper facial proportions.
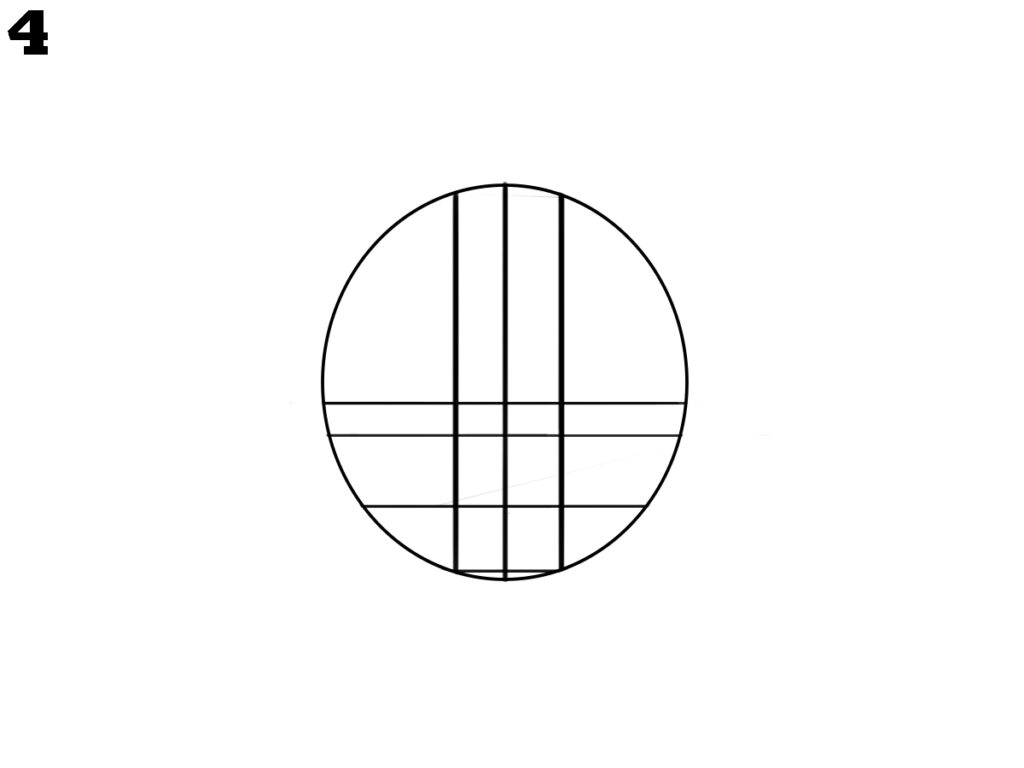
Step 4: Draw additional horizontal guidelines across the lower part of the face. These lines indicate the positions of the nose and mouth, which help structure the lower facial features when learning.
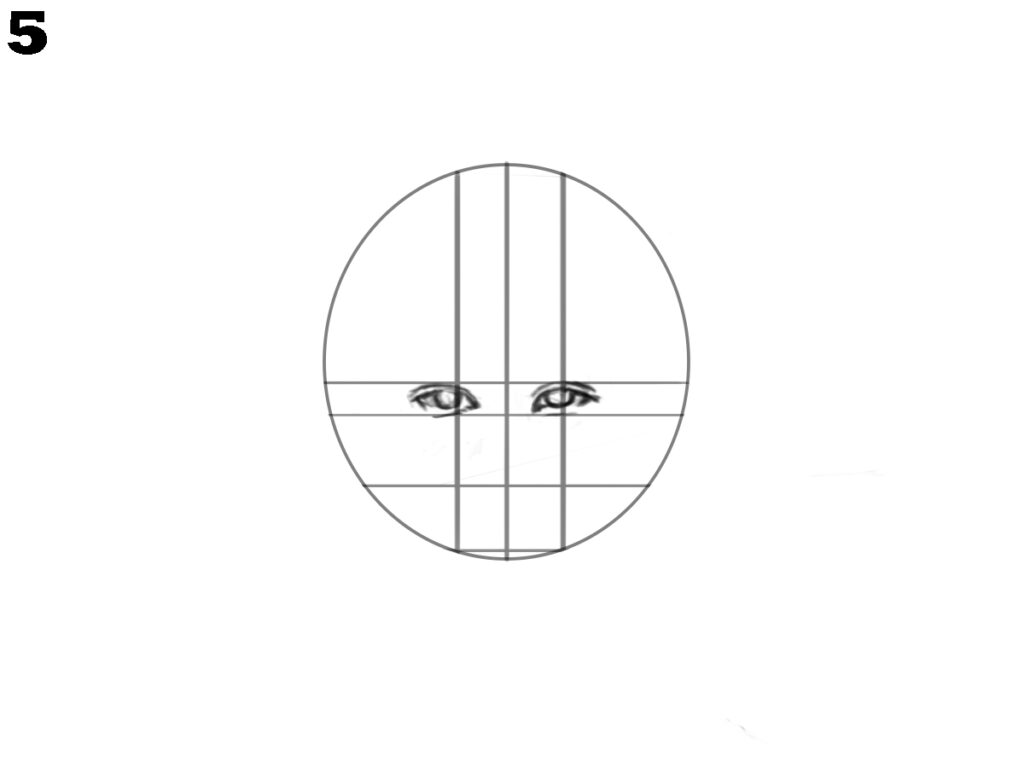
Step 5: Start drawing the eyes along the top horizontal guideline. Place them symmetrically, ensuring they fit between the vertical lines, giving a balanced look to your face drawing.
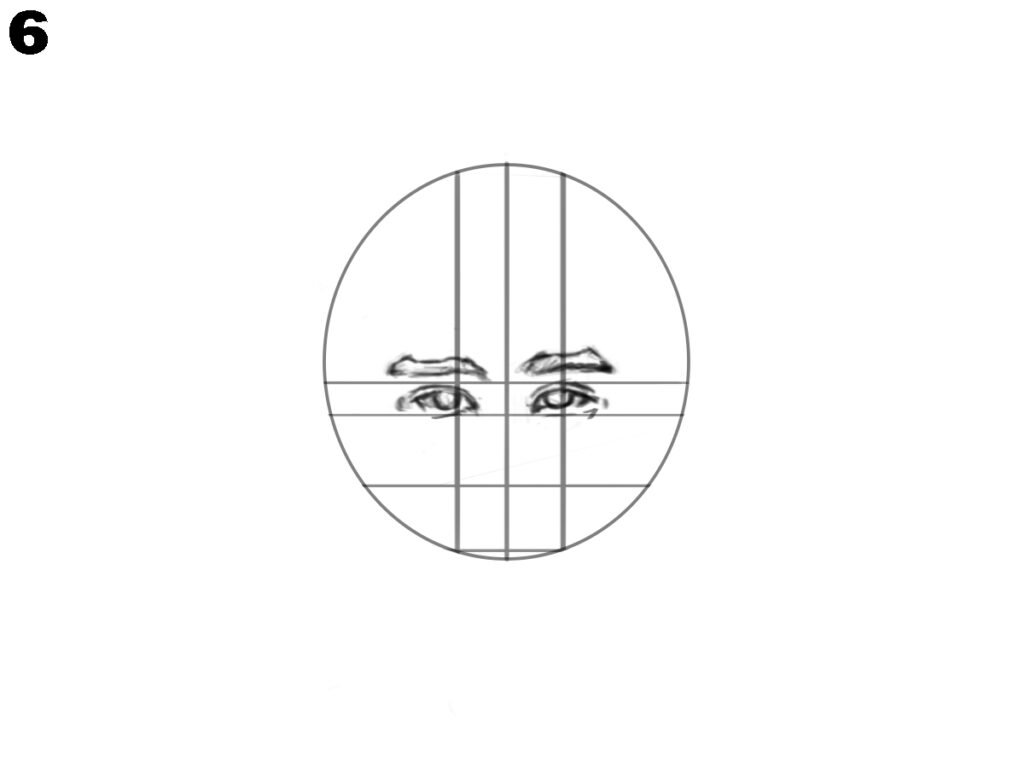
Step 6: Add the eyebrows just above the eyes, following the natural curve of the eye shape. Use the top horizontal line as a guide for even placement, enhancing the expression in your face drawing.
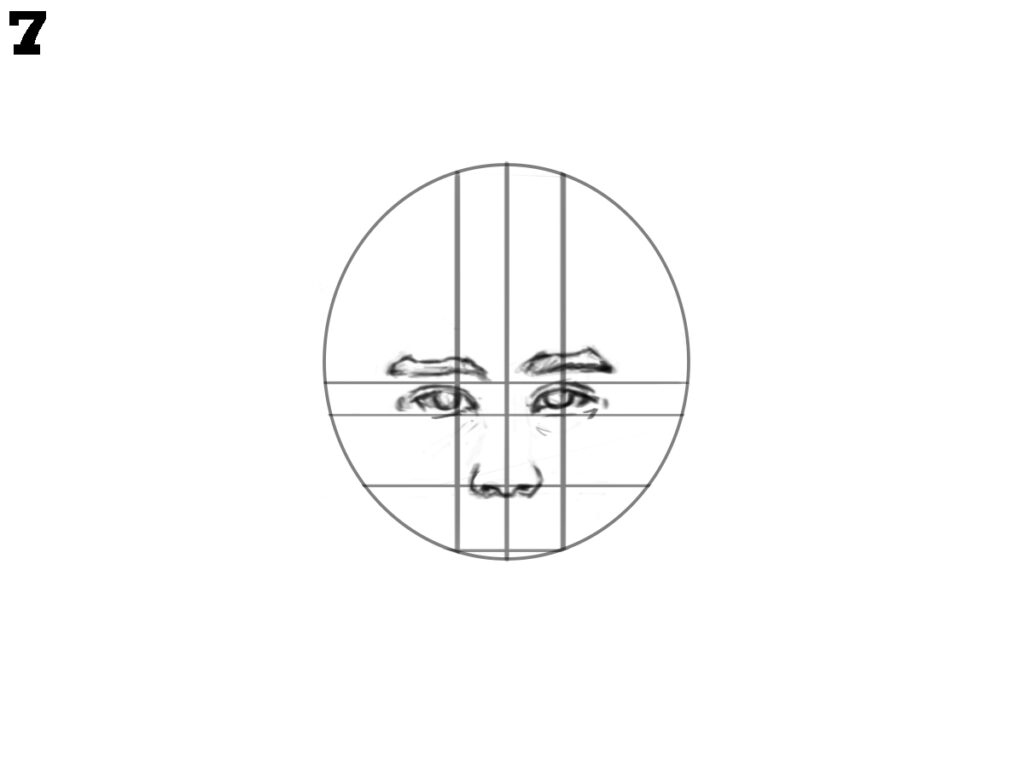
Step 7: Draw the nose by sketching its base on the middle horizontal line. Use soft curves and connect it to the eyebrow line, making your face drawing more realistic and proportional.
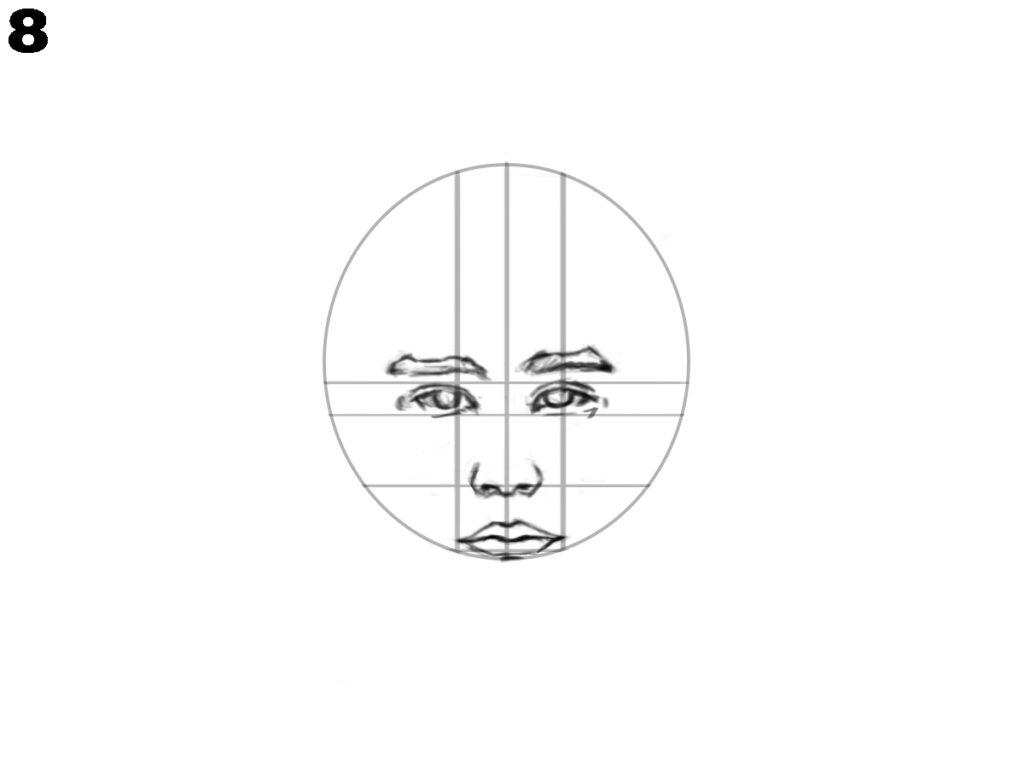
Step 8: Draw lips along the bottom line of the circle, smooth and clean as shown in the above image.
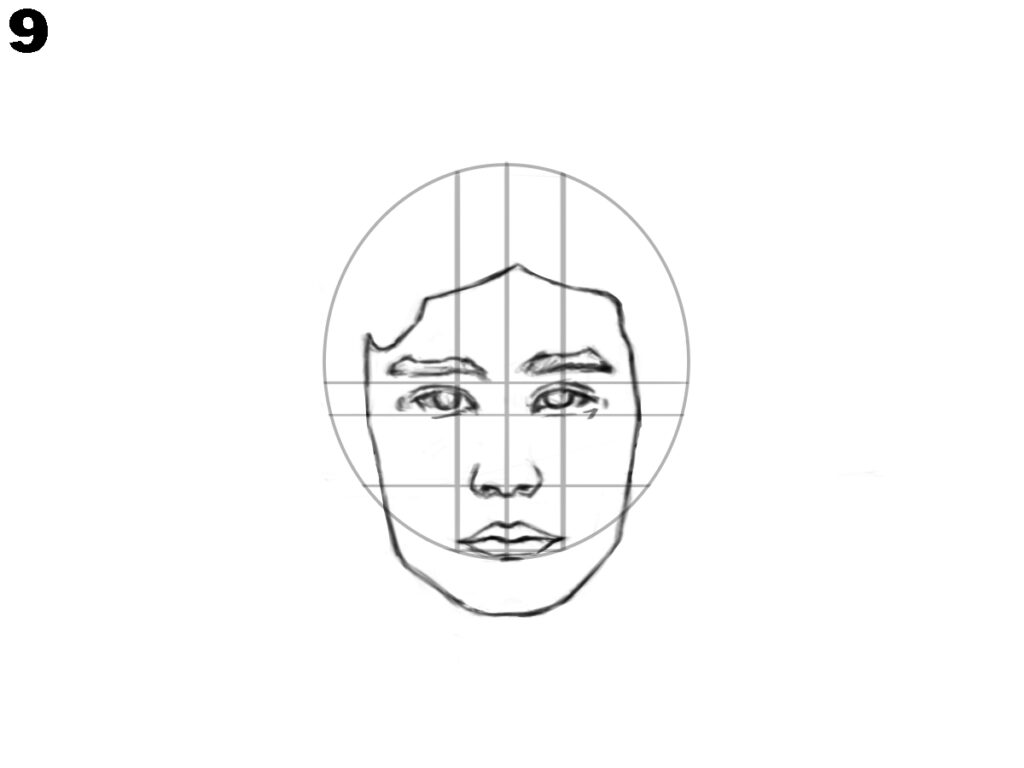
Step 9: Now Add the Hairline and Jawline: sketch the hairline and define the jawline. Follow the circle’s outer edge for the hairline and carefully draw the jaw down to the chin, matching the facial structure. Keep everything proportional to maintain facial balance.
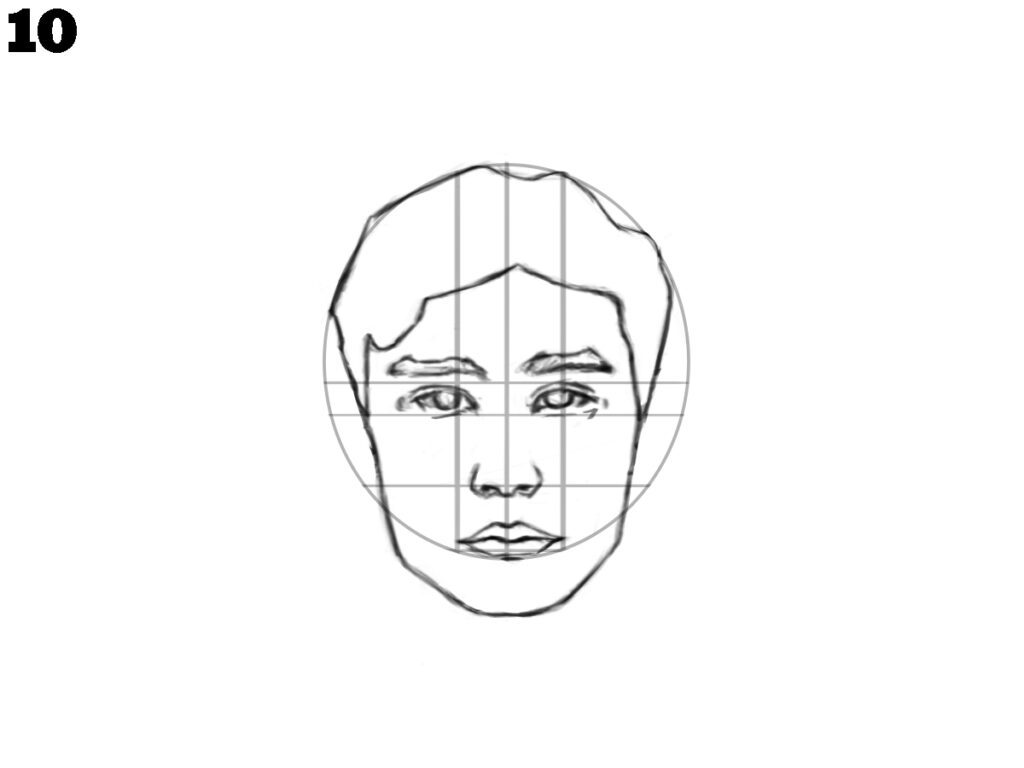
Step 10: now add the Hair and Jaw: In this step, define the outer shape of the face by sketching the hairline and jaw. Start by drawing the hair, following the contours of the head at the top. Then, move to the jawline, sketching it to create a balanced and symmetrical face structure. Ensure the jaw tapers down smoothly from the cheekbones to the chin, maintaining correct facial proportions.
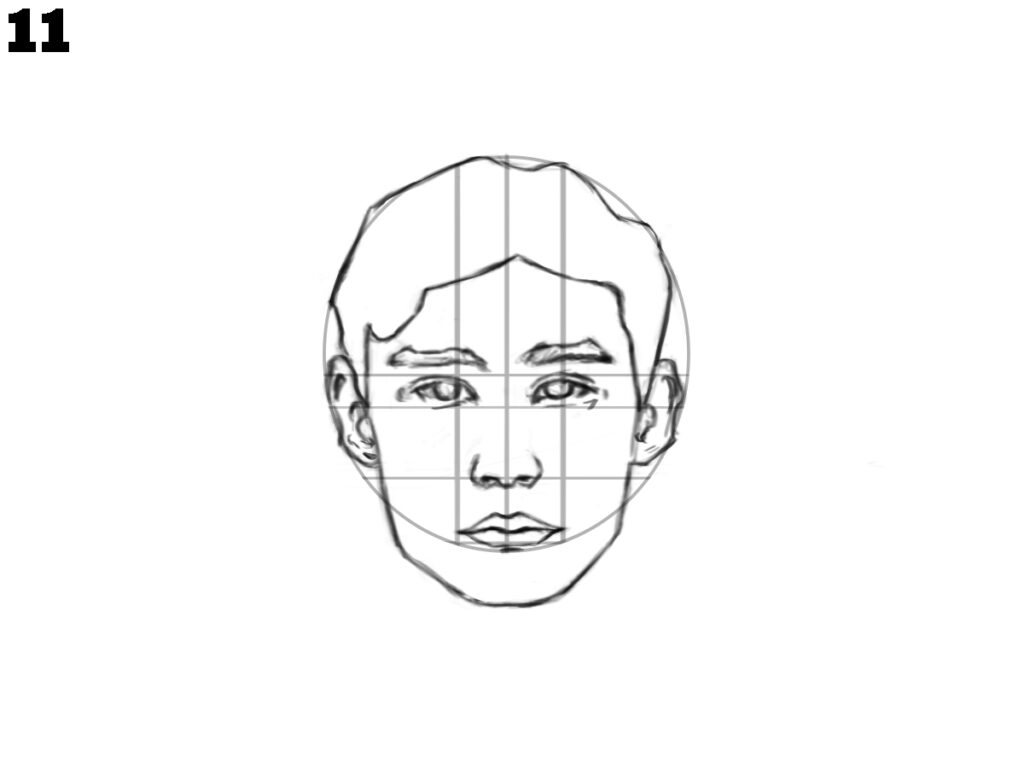
Step 11: Drawing the Ears: In this step, add the ears to the face. Position the ears on either side of the head, aligning the tops with the eye level and the bottoms with the nose line. Make sure to keep the proportions balanced, with the ears fitting naturally within the facial structure.
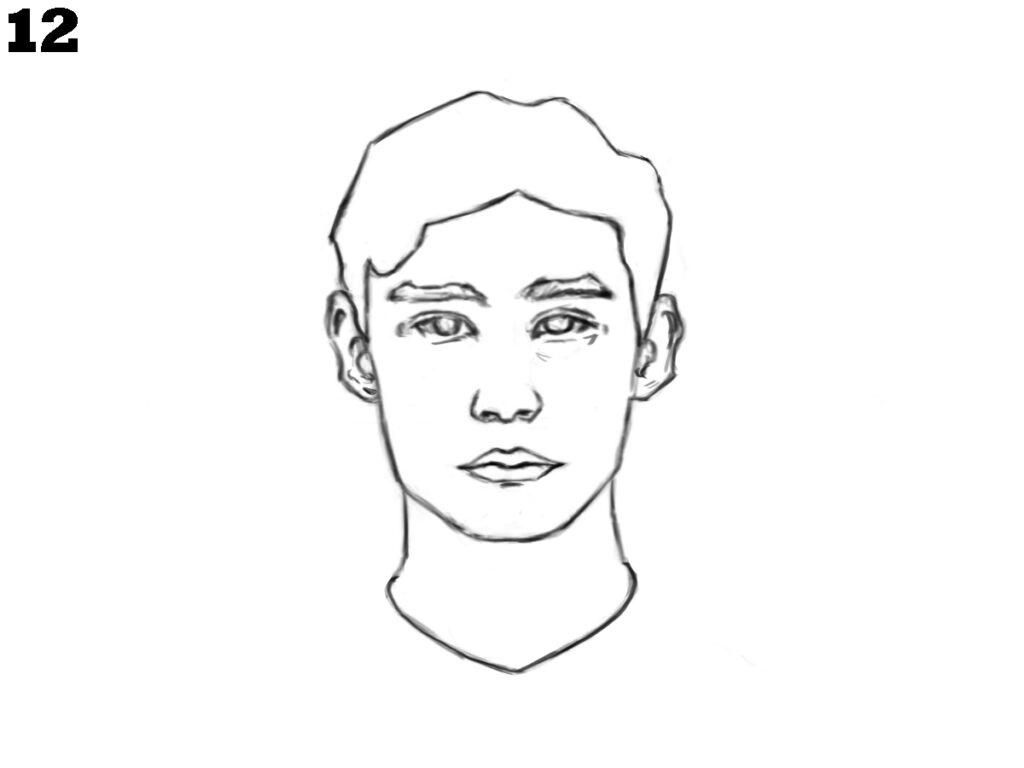
Step 12: Refine the jawline and neck contours to give the face more structure. Smooth out the transitions between the facial features, ensuring the chin has a defined, subtle curve. Add slight detail to the ears, enhancing their natural shape, while keeping the focus on symmetry.
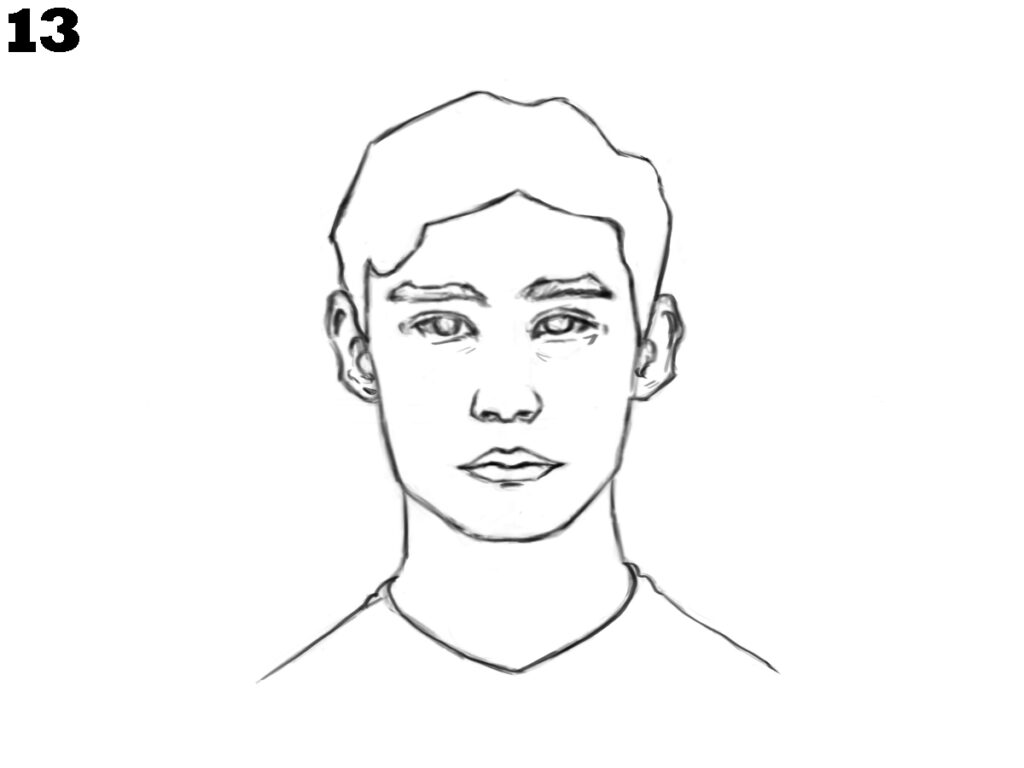
Step 13: Add a basic outline for the shoulders and neck area, ensuring the neck transitions smoothly into the torso. Refine the neckline for a more natural look, while keeping attention on the overall balance of the face and proportions.
Conclusion
Now that you’ve completed the tutorial on “how to draw a face” take a moment to review your work. Drawing faces can become easier with practice, as each sketch helps you notice details like symmetry and proportions. Remember, improvement comes with time and patience, so keep experimenting with different facial shapes and angles. Refer back to this guide whenever you need a reminder of the fundamentals. By consistently practising, you’ll see natural steady progress. Continue developing your skills, and soon drawing faces will feel naturally easy.

