Learning how to draw a star can seem challenging at first, but it’s simpler than you might think with a clear step-by-step guide. Whether you’re sketching for a project or just practising creating a perfect star requires careful attention to its symmetry and clean lines.
By following my easy method, you’ll achieve a professional-looking result without overcomplicating the process. The key lies in dividing the shape into manageable sections and refining the details as you progress. This guide provides proper instructions that are easy to follow, even for beginners. With a little effort, you can create a detailed star with a polished finish. Let’s start with the basic outline and move towards completing a Sun.
Let’s start
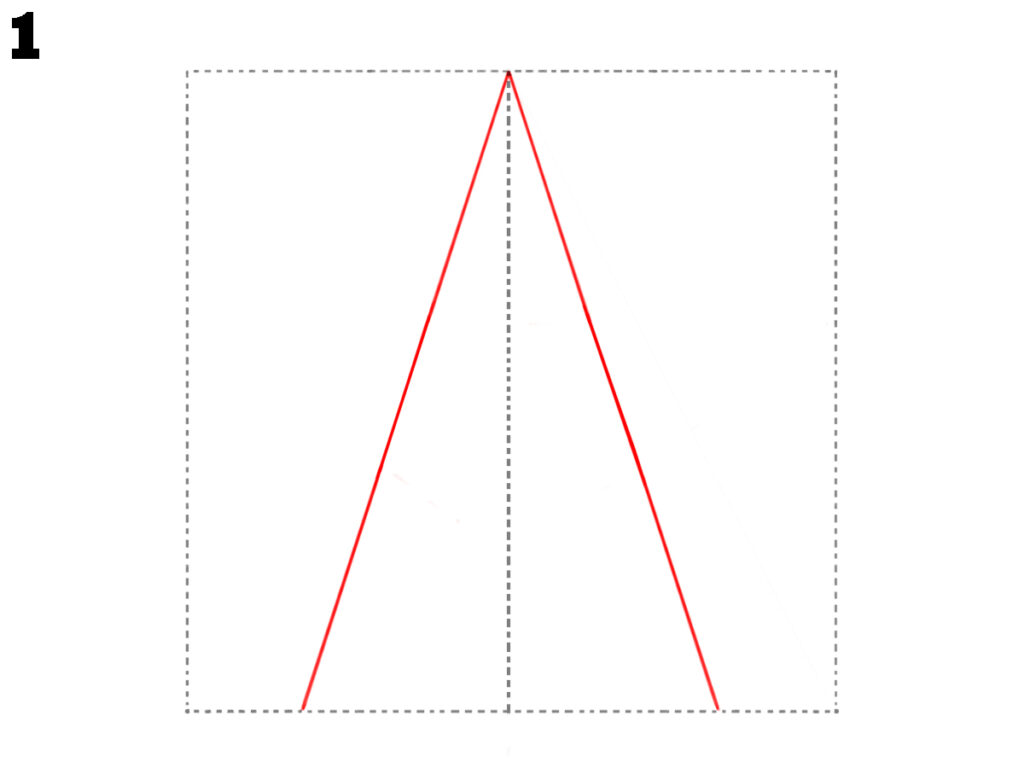
Step 1: Draw the base triangle outline
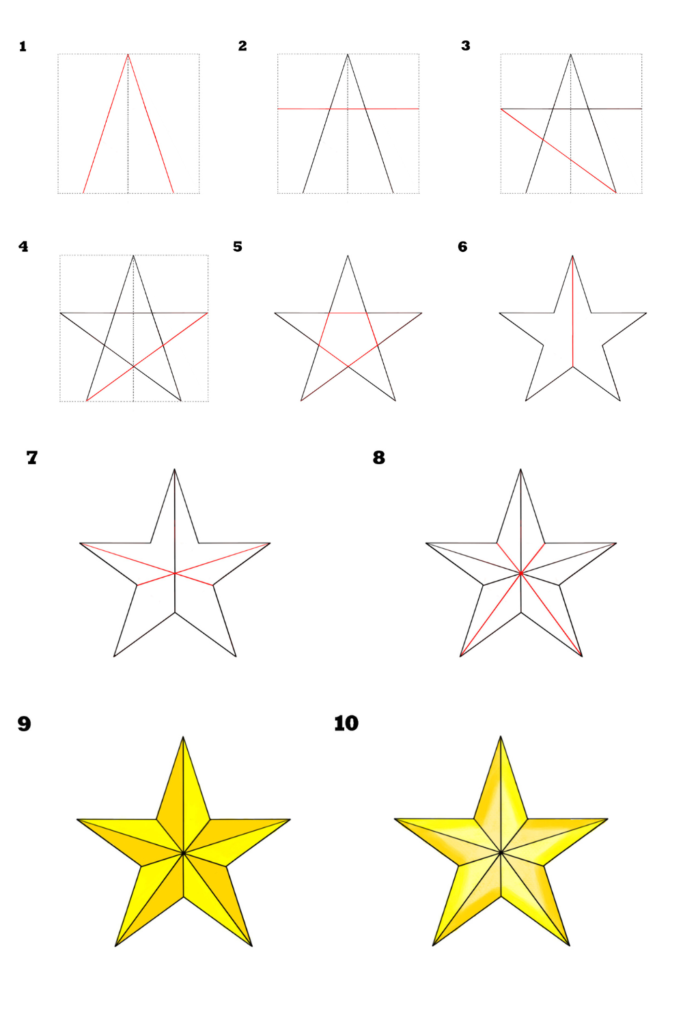
Start by creating a tall triangle in the centre of your page. Use two straight lines meeting at the top and extend them down to form the sides of the triangle.
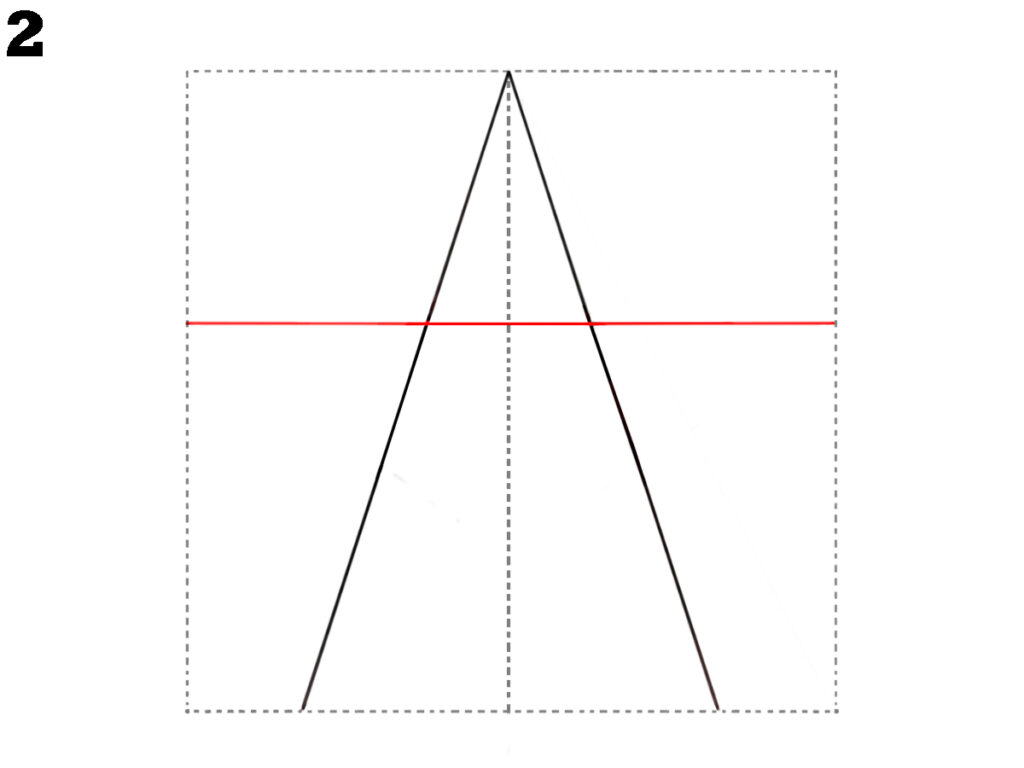
Step 2: Add a horizontal guide
Draw a straight horizontal line across the triangle. Place it slightly below the midpoint to help shape the star’s arms evenly. Keep the line neat and level.
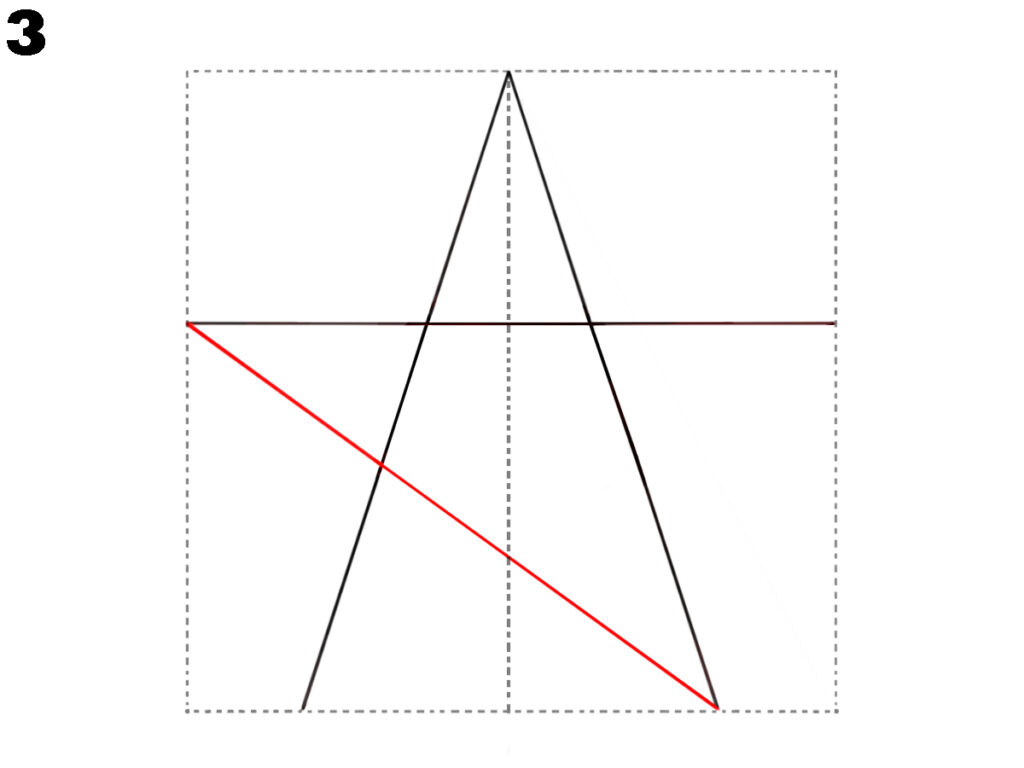
Step 3: Draw the first diagonal arm
From the left end of the horizontal line, draw a diagonal line slope upwards to the triangle’s base on the right. This forms one arm of the star.
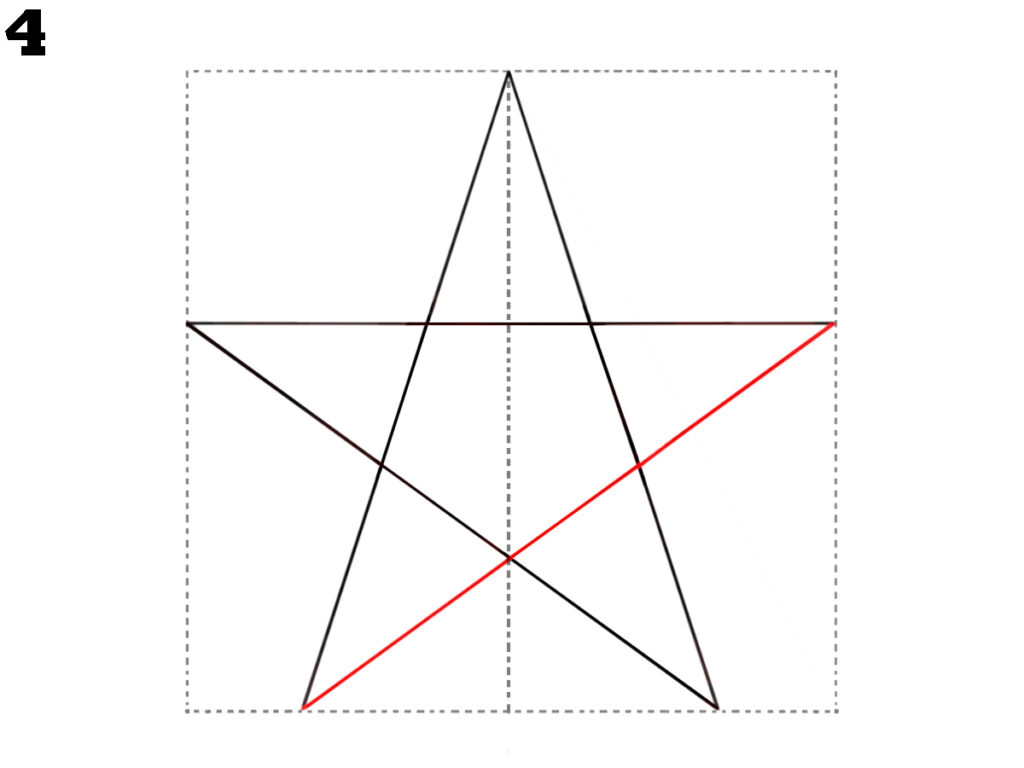
Step 4: Complete the final lines for the star-shape
To finish drawing the star, add a straight diagonal line connecting the right endpoint of the horizontal line to the bottom-left corner of the square. Make sure the line intersects correctly with the existing structure for a symmetrical star.
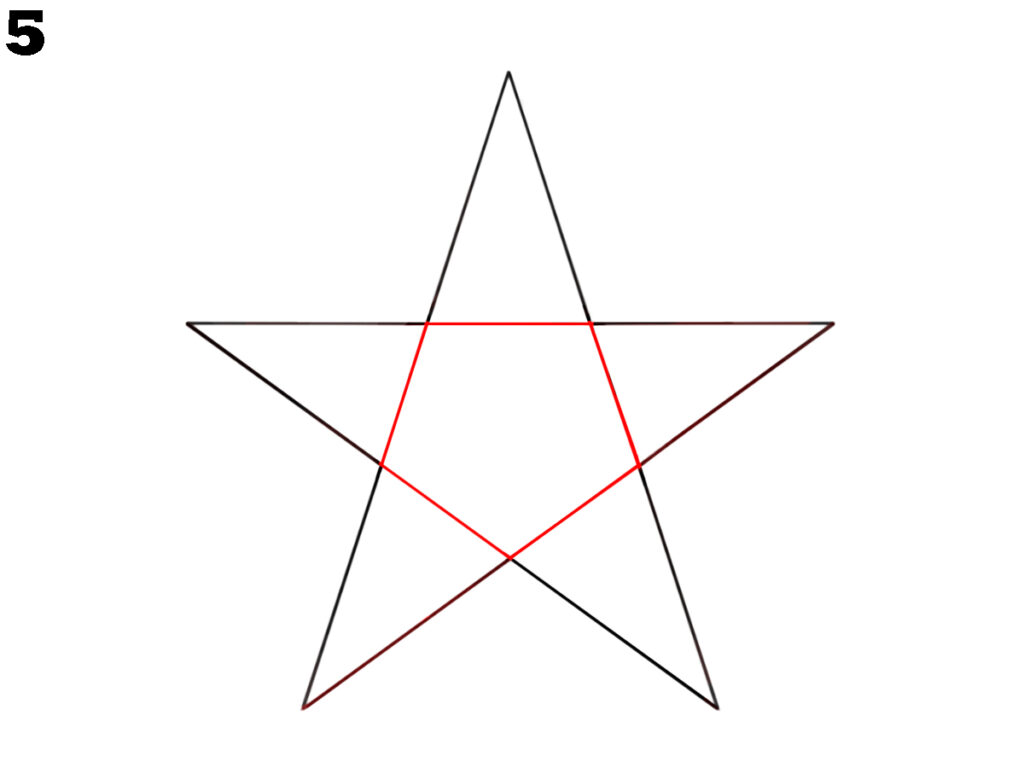
Step 5: Remove the Inner lines of the star
Connect the tips of the star points with straight lines to form the complete shape. Remove the inner pentagon lines to reveal the clean, sharp star outline.
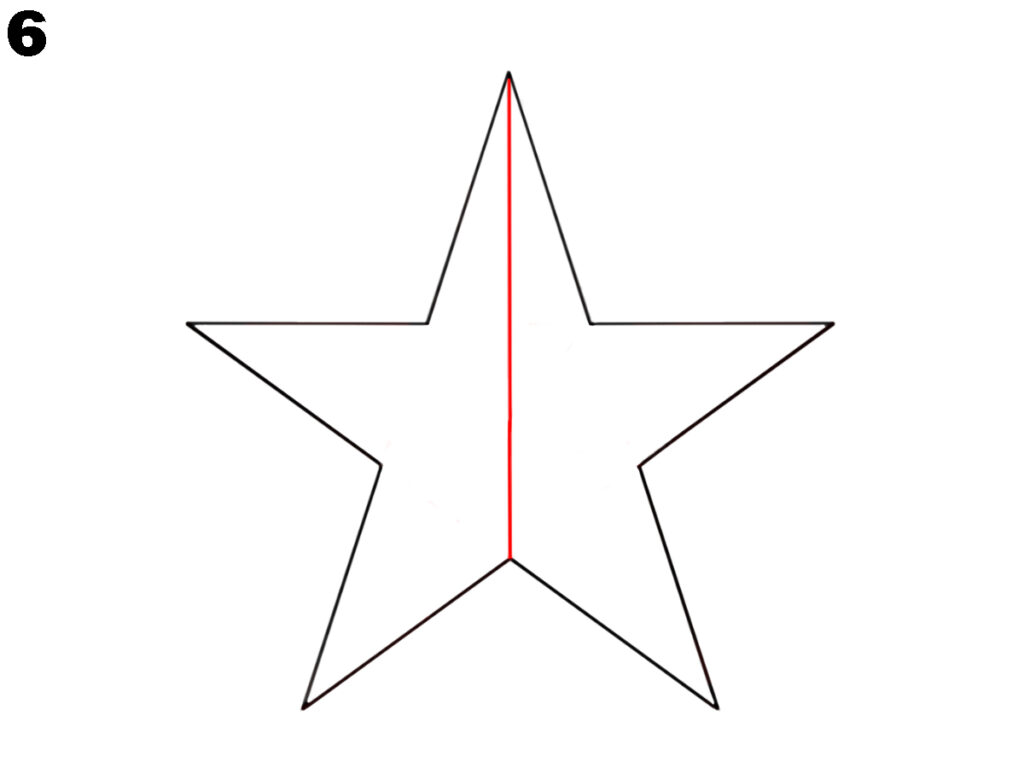
Step 6: Draw straight lines to reveal the star-shape
Draw a straight vertical line in the middle of the star as shown in the image. This red line helps balance the star’s shape.
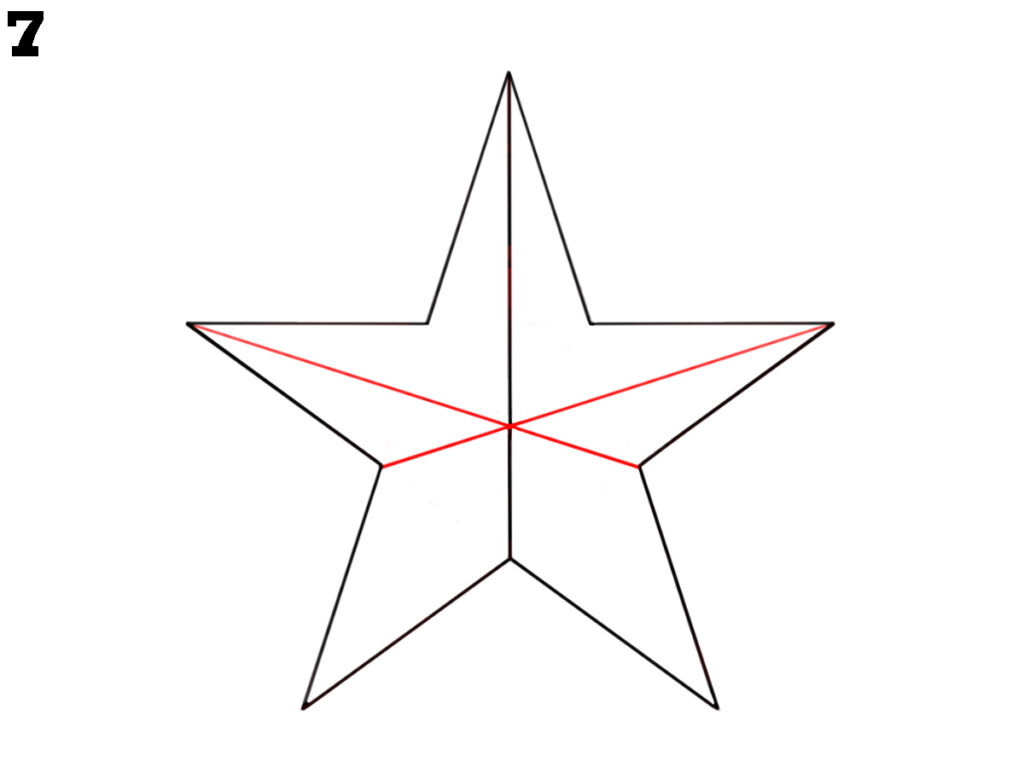
Step 7: Refine the star’s shape
Draw straight lines connecting the inner angles of the star, as shown. These guidelines enhance the structure. Erase unnecessary lines to clean up the star and make it look perfect!
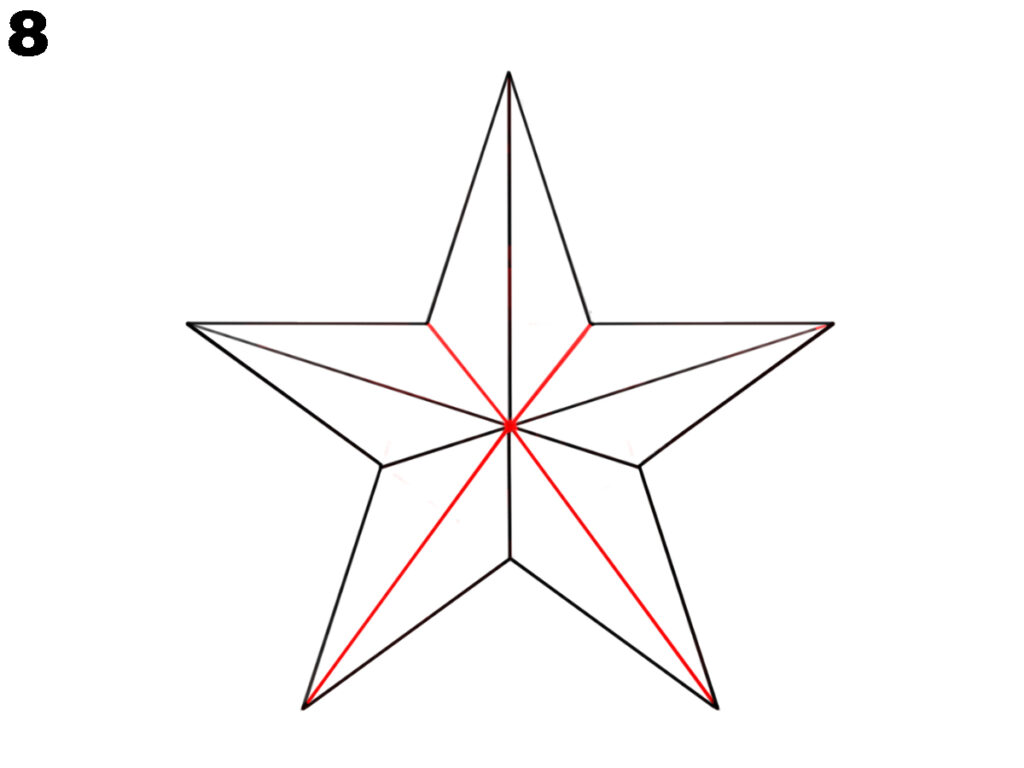
Step 8: Finalize the shape
Using a ruler, draw two straight lines as shown in the image above. Start from the inner bottom point of the star and extend the red lines to connect with the outer edges.
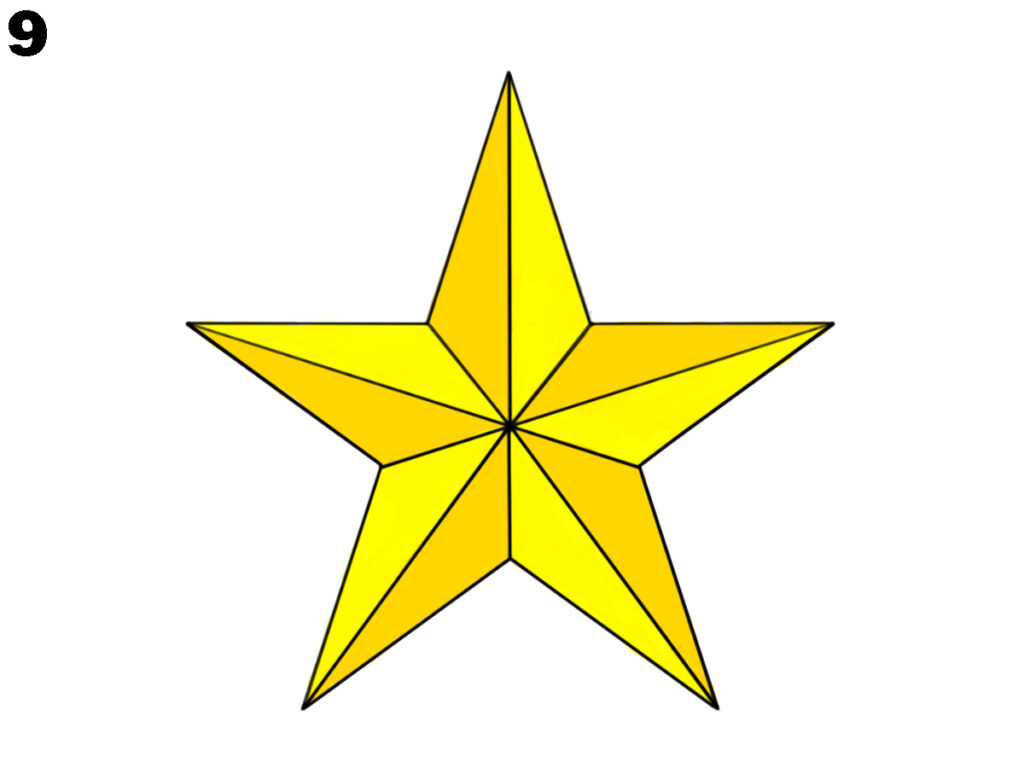
Step 9: Add colour to your star
Complete your drawing by colouring the star as shown in the image. Use vibrant yellow shades to fill each section, creating a glowing effect. Focus on blending the colours smoothly to give the star a bright, polished appearance.
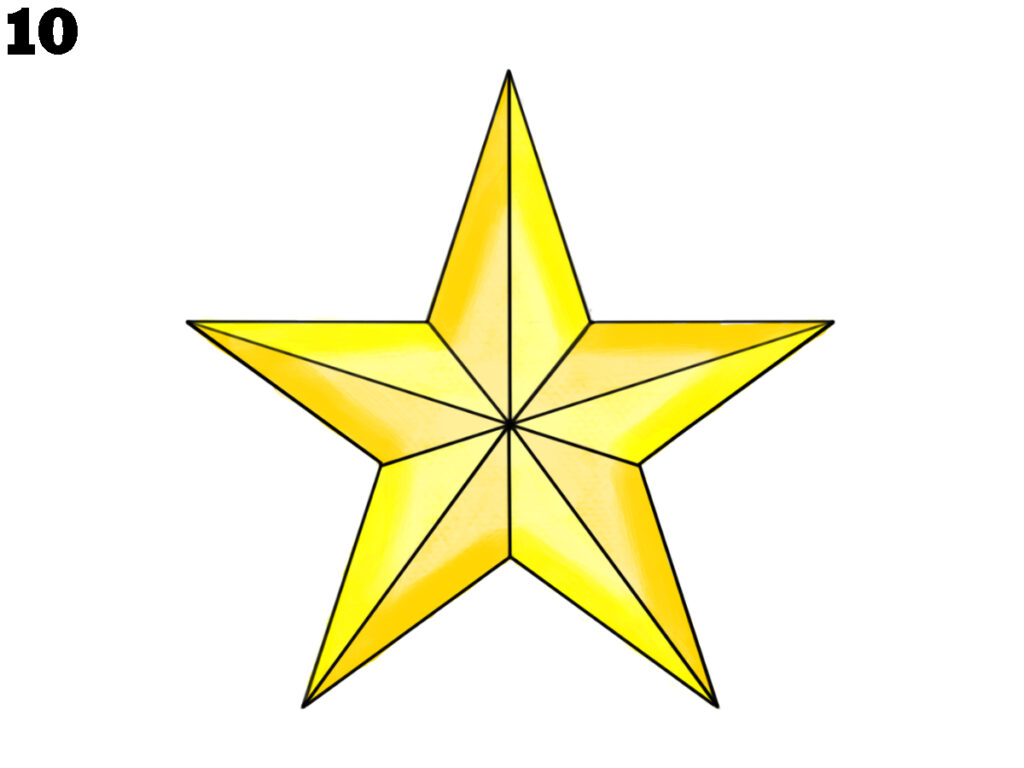
Step 10: Add shading for a realistic touch
To finish your star highlight its appearance with shading. Add subtle gradients and highlights, as shown in the image to give it a glowing effect. Focus on blending lighter and darker yellow tones along the edges and inner sections for a polished and realistic result. This step makes your star stand out beautifully.
Conclusion
By the end of this process, you should have a completed star with precise lines, vibrant colour, and realistic shading. Taking the time to focus on each step helps ensure the final result is symmetrical and visually appealing. If you follow along carefully, your star will look polished and well-defined. Practising techniques like shading and smooth transitions of colour will also improve your future sketches. Remember, drawing is a skill that grows with consistency. With this method, you now have a reliable way to draw a star easily whenever needed. Keep practising, and each attempt will get better.

